Garbage Disposal Picks & Troubleshooting Tips
Hey there! Are you ready for our garbage disposal picks? Have you ever wondered what happens to all the food waste that goes down your kitchen sink? With InSinkErator garbage disposers, such as the continuous feed garbage disposal unit, you can easily dispose of food waste and keep your kitchen clean. Well, let’s talk about it!
Garbage disposers, like the Insinkerator, are nifty little appliances that grind up food waste in kitchen sinks into tiny particles, making it easier to handle for plumbing. Not only do disposal units, also known as disposers, save you from the hassle of dealing with smelly garbage bins, but they also help reduce the amount of organic waste that ends up in landfills. These units are commonly installed under kitchen sinks, and one famous brand is Insinkerator.
Picture this: you’re standing at your kitchen sink, peeling potatoes or washing dishes, and with a simple flick of a switch, your Insinkerator garbage disposal unit springs to life. It effortlessly grinds and disposes of food waste, keeping your plumbing system clean and preventing clogs in your pipes. The Insinkerator garbage disposal effortlessly grinds and shreds those leftover scraps into oblivion, making it the perfect continuous-feed garbage disposal unit for your kitchen. These handy InSinkErator garbage disposal devices, also known as continuous feed garbage disposers, are usually installed under your sink and connected to your plumbing system through a pipe. And don’t worry about any mess – the grinding process in the Insinkerator garbage disposal is accompanied by a steady flow of water through the unit’s pipe. This ensures that your plumbing remains clear and efficient, making disposal units a convenient and reliable choice.
So, if you’re tired of constantly emptying overflowing trash cans or dealing with unpleasant odors in your kitchen, an InSinkErator garbage disposal might just be what you need. It’s a plumbing device that helps you eliminate food waste by grinding it into small particles that can easily flow through the pipe and into the water system. Let’s dive deeper into how these InSinkErator garbage disposal units work and explore some popular options available on the market today. These disposers are designed to efficiently grind food waste and safely send it down the pipe, making them a convenient and effective solution for plumbing needs.
Types and Features of Garbage Disposals
Garbage disposals, a series of plumbing devices, come in different types, each designed to efficiently handle water and a list of waste materials, meeting your specific needs.
Two Main Types
- Continuous feed disposals: These water-powered devices allow you to add food waste while the disposal runs, providing convenience and efficiency. With our series of continuous feed disposals, you can enjoy the benefits of free delivery every Friday. Plus, each disposal comes with a durable power cord for easy installation. No need to wait for the InSinkErator garbage disposal with continuous feed to stop before adding more scraps.
- Batch feed disposals, part of the series of water-powered disposals, require you to load the chamber with food waste before grinding. This is an important consideration when buying a disposal.
Additional Features
- Some garbage disposals have noise reduction technology, providing a quieter operation. This feature enhances the power and water delivery of the disposal.
- Many models boast durable stainless steel blades that can handle tough food scraps, ensuring efficient water delivery without dulling or corroding quickly.
With these delivery options available, you can choose a water garbage disposal that suits your preferences and requirements.
Troubleshooting Common Problems with Garbage Disposals
Let’s assume you took our recommendation. Is your InSinkErator garbage disposal acting up? Don’t worry; we’ve got you covered! Here are some quick fixes for the most common water problems. Don’t fret. These are common fixes and apply to most other models.
Jammed Blades
If your garbage disposal is not working correctly, it might be jammed.. Grab a hex wrench and manually rotate the blades to loosen any obstructions in the water pump (HP). This should get things moving smoothly again. A three foot broom handle works fine as well.
Won’t Turn On
Is your disposal refusing to come to life? First, make sure it’s properly plugged in. Look for a reset button on the bottom of the unit. That might do the trick!
Foul Odor
Nobody wants their kitchen smelling like yesterday’s leftovers! To combat unpleasant odors coming from your disposal, try grinding citrus peels or using a mixture of baking soda and vinegar as natural deodorizers. Your nose will thank you!
Leaking from the Bottom
Uh-oh! If you notice water leaking from the bottom of your garbage disposal, it could be due to a worn-out seal or loose connections. This issue can be resolved by contacting a professional plumber. They will inspect the unit and provide the necessary repairs to fix the leak. Prompt delivery of these services will ensure that your garbage disposal is back to working efficiently, allowing you to continue using it without any concerns. Don’t let a leaky garbage disposal dampen your kitchen experience – reach out to experts who can resolve this issue and restore your appliance to its full functionality in no time.
If these troubleshooting tips don’t solve your water delivery problem, consult your warranty or call a professional electrician for help with electrical shorts or other complicated issues.
So there you have some handy solutions for common garbage disposal problems! Whether it’s clogged pipes or a jammed motor, these tips will help you fix the issue. Don’t let a faulty garbage disposal disrupt your daily routine. Augment your knowledge with these simple solutions and ensure your garbage disposal never starts another plumbing nightmare. Whether it’s clogged pipes or a jammed motor, these tips will help you fix the issue and restore your unit. With these tricks up your sleeve, you’ll be back to enjoying hassle-free water delivery and waste management in no time.
Solutions for Leaks in Garbage Disposals
Is your garbage disposal leaking? Don’t worry. There are simple solutions to fix the problem. Let’s go through some common leaks and how you can address them. These tips will help you fix any issues and ensure a smooth process. Water Leaking from the Top Flange:
- Tighten the mounting bolts to secure the flange.
- Replace the plumber’s putty or gasket in if it is worn out or damaged to ensure proper delivery.
Leak at the Dishwasher Connection
- Ensure a secure hose clamp connection between the dishwasher and disposal for reliable delivery and installation of the auger. The connection should be tight to prevent any leaks or loose connections that could compromise the dishwasher’s performance and disposal. By following these steps, you can ensure that your dishwasher and disposal are correctly connected and ready to tackle any mess, earning them five stars for their efficient delivery.
- If necessary, replace any damaged parts in the connection.
Leaks around the Reset Button or Electrical Components
- Consult a professional for delivery repairs to address leaks near electrical components and ensure your home’s safety.
Cracks in the Disposal Unit Itself
- Unfortunately, if there are cracks in the disposal unit, it must be replaced entirely. The replacement unit will come with new parts and will ensure that your kitchen runs smoothly, earning it five stars.
Fixing a leaky garbage disposal in Aug doesn’t have to be a daunting task. With prompt delivery of the necessary parts, you can quickly get your disposal up and running smoothly again. Don’t let a leaky disposal dampen your kitchen experience – take action and fix it. Following these simple steps can resolve the most common leaks and keep your kitchen running smoothly. These steps will ensure that your kitchen receives five stars for its efficient operations. Remember, when dealing with electrical components for aug delivery, it’s always best to consult a professional for safety reasons.
Benefits of Using Garbage Disposals in Kitchen Renovations
- Installing a garbage disposal during kitchen renovations adds convenience by eliminating the need for constant trash disposal. With the aug of a garbage disposal, you can easily dispose of food waste and keep your kitchen clean. Say goodbye to the hassle of taking out the trash every day and enjoy the benefits that this appliance stars in providing. With the aug of a garbage disposal, you can easily dispose of food waste and keep your kitchen clean. Say goodbye to the hassle of taking out the trash every day and enjoy the benefits that this appliance stars in providing. With the aug of a garbage disposal, you can easily dispose of food waste and keep your kitchen clean. Say goodbye to the hassle of taking out the trash every day and enjoy the benefits that this appliance provides. Get a garbage disposal to throw away food and keep your kitchen clean. Say goodbye to the hassle of taking out the trash daily and enjoy this appliance’s benefits.
- It reduces the risk of unpleasant odors and pests attracted to food waste in garbage bins, making it an excellent solution for maintaining cleanliness and hygiene.
- Garbage disposals help minimize landfill waste, creating a more sustainable lifestyle for all.
- Using a garbage disposal can also prevent clogged drains caused by food scraps, allowing your kitchen to shine.
During kitchen renovations, incorporating a garbage disposal brings numerous benefits that enhance both functionality and cleanliness. Adding a garbage disposal to your kitchen renovation can help you efficiently dispose of food waste, improving the overall cleanliness of your space. Additionally, having a garbage disposal can enhance your kitchen’s functionality by providing a convenient way to eliminate food scraps. So, when planning your kitchen renovation, consider including a garbage. Adding a garbage disposal to your kitchen renovation can help you efficiently dispose of food waste, improving the overall cleanliness of your space.
Not only does using a garbage disposal save you time and effort, but it also helps keep unpleasant odors at bay. Food waste in traditional garbage bins can quickly become a breeding ground for unwanted pests and emitting foul smells. The organic matter is efficiently ground up with a reliable garbage disposal installed beneath your sink.
In addition to the convenience factor, incorporating a garbage disposal into your kitchen renovations promotes sustainability and helps reduce waste. The garbage disposal efficiently disposes of food scraps, making it an essential addition to any eco-friendly kitchen. By reducing landfill waste, you create a greener environment. Food scraps that would have otherwise ended up in trash bags are processed through the disposal system and sent down the drain instead.
Furthermore, using a garbage disposal helps prevent clogged drains caused by food scraps. Instead of worrying about bits of leftovers getting stuck in your pipes and causing blockages, the decisive grinding action of the disposal ensures that everything is finely chopped before being washed away effortlessly.
Environmental Considerations for Garbage Disposal Adoption/Bans
Some cities or regions have adopted garbage disposal bans due to concerns about wastewater treatment capacity or environmental impact. However, modern garbage disposals are designed with advanced grinding and filtration systems that address these concerns effectively.
Proper usage and regular maintenance of garbage disposals can mitigate any potential adverse environmental effects. By following a few simple guidelines, individuals can ensure that their garbage disposals operate efficiently and responsibly:
- Avoid disposing of large quantities of food waste at once. Instead, gradually feed small portions into the disposal to prevent overwhelming the system.
- Only dispose of biodegradable food waste in the garbage disposal. Non-biodegradable items such as plastics, metals, or glass should never be thrown into the unit.
- Run water before, during, and after using the disposal to aid in the smooth flow of waste through the system.
- Use cold water when operating the garbage disposal as it helps solidify fats and oils, preventing clogs.
Remember: proper usage and regular maintenance play critical roles in ensuring that garbage disposals remain environmentally friendly while providing a practical solution for managing food waste.
Facts
Can I use my garbage disposal for all types of food waste?
Yes and no. While most food waste is safe to put in a garbage disposal, there are some exceptions. Avoid disposing of large bones, coffee grounds, grease or oil, fibrous vegetables like celery or corn husks, and non-food items like paper towels or plastic wrappers.
How do I know if my garbage disposal needs repair?
If your garbage disposal is making strange noises, emitting foul odors even after cleaning, or consistently clogging despite proper usage, it may be time for a repair. Contact a professional plumber who specializes in garbage disposals to assess the issue.
Is it possible to install a garbage disposal in an older home?
In many cases, yes! However, installing a garbage disposal in an older home may require additional plumbing work due to outdated piping systems. Consult with a professional plumber to determine if your home is suitable for a garbage disposal installation.
Can I replace my own garbage disposal?
While technically possible for those with advanced DIY skills, it’s generally recommended to hire a professional plumber for garbage disposal replacement. They have the expertise and tools needed to ensure a safe and proper installation.
Are there any alternatives to using a garbage disposal?
If you’re looking for an alternative to a traditional garbage disposal, consider composting your food waste instead. Composting is an eco-friendly option that allows you to turn organic waste into nutrient-rich soil for your garden.
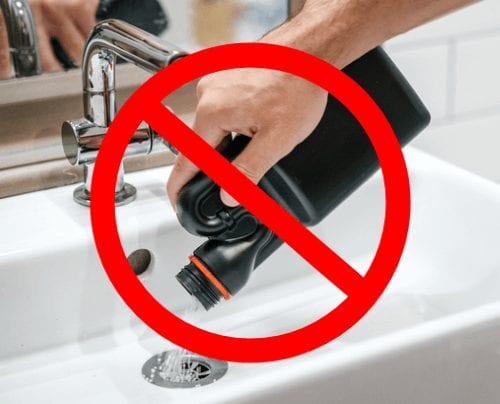


 First, protect yourself. Before attempting to unclog any drain, always wear eye protection. Water under pressure tends to splash around and really don’t want dirty, contaminated or caustic water in your eye.
 Always wear rubber gloves. Water in a clog usually contains harmful bacteria you don’t want on your hands. Rubber gloves will keep your hands clean and dry.
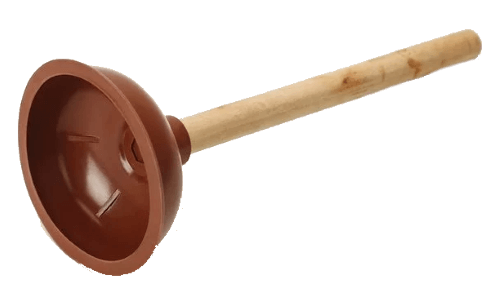
 If you move on to using a plunger, make sure you’re using the right type. For a sink, use a cup plunger. Its flat base makes a good seal around the flat area of the drain.
 The last thing anyone wants is a clogged toilet. But because toilets have a bigger drain, they generally don’t clog as often as sinks or tubs. Many times, the clog is caused by toys and other items that kids have flushed down the toilet. Might be a good idea to discourage children throwing things into the toilet.
 Before you try any other method of unclogging your toilet, you must make sure the toilet doesn’t refill and possibly overflow while you work. First, take the lid off the tank and close the toilet flapper.
 Find the football-shaped handle under the toilet tank and turn it clockwise.

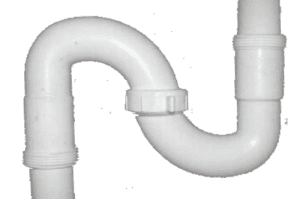 They had a tendency to “siphon” the water out that’s supposed to remain behind to keep sewer gases out.
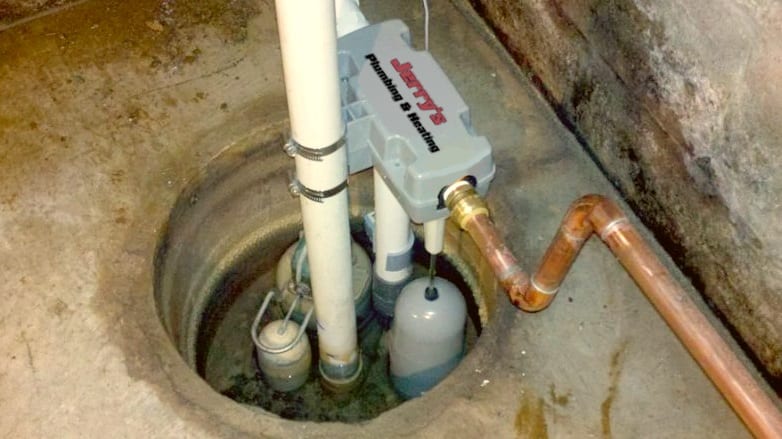


 Backup Sump Pump
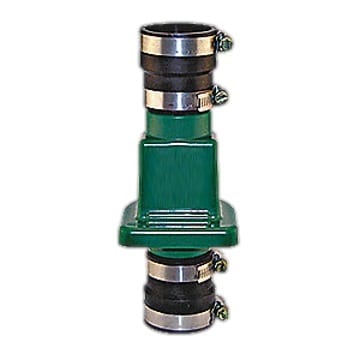 Check Valve
 Sump Pump


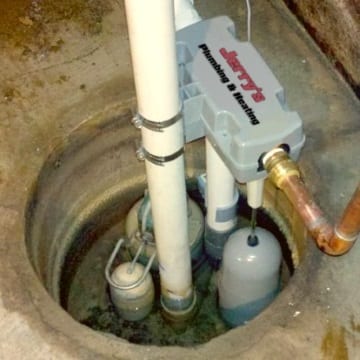 Sump Pump Pit